Wednesday, January 27, 2010

Nanaimo Bars - Daring Bakers Challenge for January 2010

Dear All,

Photobucket

The January 2010 Daring Bakers' Challenge was hosted by Lauren of Celiac Teen. Lauren chose Gluten-Free Graham Wafers and Nanaimo Bars as the challenge for the month. The sources she based her recipe are on 101 Cookbooks and www.nanaimo.ca.

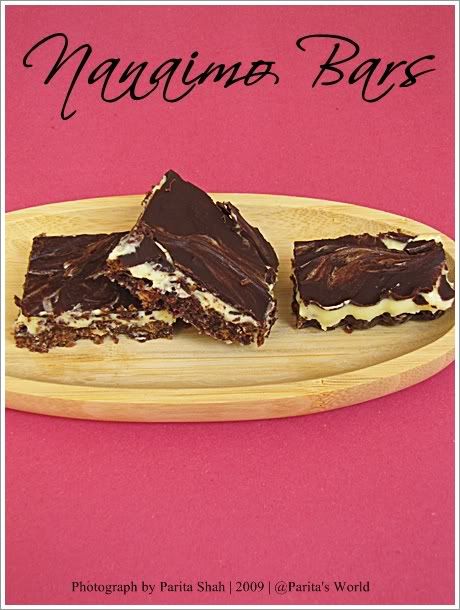
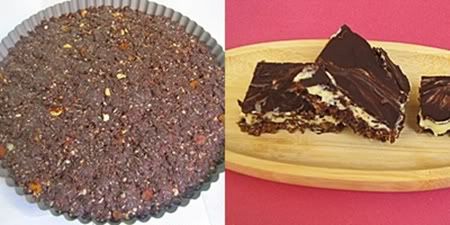
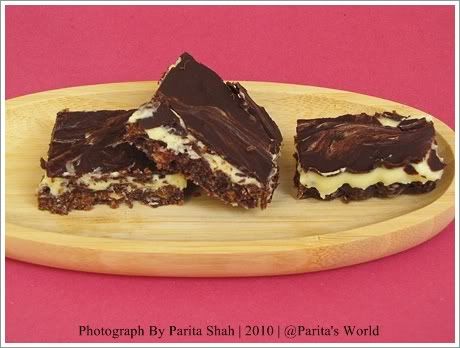
This was the first time I was making Nanaimo Bars and I am so impressed with these I cant tell you. These bars are packed with goodness of chocolate with almonds and coconut as base, the middle layer consist of rich vanilla custard cream, topped with melted dark chocolate. I wanted to make Graham Crackers at home from a very long time since we dont get these here, this challenge gave me the perfect opportunity to try my hands on some delicious home made graham crackers plus making them was so easy and they tasted fabulous!


Photobucket

Recipe for Graham Crackers:-
2 1/4 cups of all purpose flour (You can use whole wheat + APF)
1 cup (200gms) Dark brown sugar, lightly packed
1 tsp baking soda
3/4 tsp salt
7 tbsp (100gms) unsalted butter, cut into squares, frozen
1/3 cup (80 ml) honey
5 tbsp (75 ml) whole milk
2 tbsp pure vanilla extract

Procedure:-
  • In the bowl of a food processor fitted with a steel blade, combine the flours, brown sugar, baking soda, and salt. Pulse on low to incorporate. Add the butter and pulse on and off, until the mixture is the consistency of a coarse meal. If making by hand, combine aforementioned dry ingredients with a whisk, then cut in butter until you have a coarse meal. No chunks of butter should be visible.
  • In a small bowl or liquid measuring cup, whisk together the honey, milk and vanilla. Add to the flour mixture until the dough barely comes together. It will be very soft and sticky.
  • Turn the dough onto a surface well-floured with sweet rice flour and pat the dough into a rectangle about 1 inch thick. Wrap in plastic and chill until firm, about 2 hours, or overnight.
  • Divide the dough in half and return one half to the refrigerator. Sift an even layer of sweet rice flour onto the work surface and roll the dough into a long rectangle, about 1/8 inch thick. The dough will be quite sticky, so flour as necessary. Cut into 4 by 4 inch squares. Gather the scraps together and set aside. Place wafers on one or two parchment-lined baking sheets. Chill until firm, about 30 to 45 minutes. Repeat with the second batch of dough.
  • Adjust the rack to the upper and lower positions and preheat oven to 350 degrees Fahrenheit (180 degrees Celsius).
  • Gather the scraps together into a ball, chill until firm, and reroll. Dust the surface with more sweet rice flour and roll out the dough to get a couple more wafers.
  • Prick the wafers with toothpick or fork, not all the way through, in two or more rows.
  • Bake for 25 minutes, until browned and slightly firm to the touch, rotating sheets halfway through to ensure even baking. Might take less, and the starting location of each sheet may determine its required time. The ones that started on the bottom browned faster.
  • When cooled completely, place enough wafers in food processor to make 1 ¼ cups (300 mL) of crumbs. Another way to do this is to place in a large ziplock bag, force all air out and smash with a rolling pin until wafers are crumbs.
Photobucket

Nanaimo Bars
Ingredients:-
For Nanaimo Bars — Bottom Layer
1/2 cup (115 g) (4 ounces) Unsalted Butter
1/4 cup (50 g) (1.8 ounces) Granulated Sugar
5 tablespoons (75 mL) Unsweetened Cocoa
1 Large Egg, Beaten
1 1/4 cups (300 mL) (160 g) (5.6 ounces) Gluten Free Graham Wafer Crumbs (See previous recipe)
1/2 cup (55 g) (1.9 ounces) Almonds (Any type, Finely chopped)
1 cup (130 g) (4.5 ounces) Coconut (Shredded, sweetened or unsweetened)

For Nanaimo Bars — Middle Layer
1/2 cup (115 g) (4 ounces) Unsalted Butter
2 tablespoons and 2 teaspoons (40 mL) Heavy Cream
2 tablespoons (30 mL) Vanilla Custard Powder (Such as Bird’s. Vanilla pudding mix may be substituted.)
2 cups (254 g) (8.9 ounces) Icing Sugar

For Nanaimo Bars — Top Layer
4 ounces (115 g) Semi-sweet chocolate
2 tablespoons (28 g) (1 ounce) Unsalted Butter

Procedure:-
  • For bottom Layer: Melt unsalted butter, sugar and cocoa in top of a double boiler. Add egg and stir to cook and thicken. Remove from heat. Stir in crumbs, nuts and coconut. Press firmly into an ungreased 8 by 8 inch pan.
  • For Middle Layer: Cream butter, cream, custard powder, and icing sugar together well. Beat until light in colour. Spread over bottom layer.
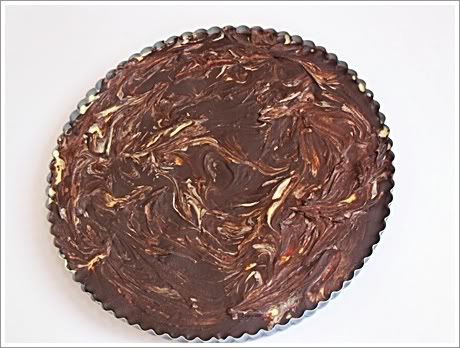
  • For Top Layer: Melt chocolate and unsalted butter over low heat. Cool. Once cool, pour over middle layer and chill.
  • I made some swirls on the top with melted chocolate and custard cream, personally i loved the effect!

Photobucket

Additional Information:

These bars freeze very well, so don’t be afraid to pop some into the freezer.

The graham wafers may be kept in an airtight container for up to 2 weeks. Mine lasted about that long.

If making the graham crackers with wheat, replace the gluten-free flours (tapioca starch, sweet rice flour, and sorghum flour) with 2 ½ cups plus 2 tbsp of all-purpose wheat flour, or wheat pastry flour. Watch the wheat-based graham wafers very closely in the oven, as they bake faster than the gluten-free ones, sometimes only 12 minutes.

For the Nanaimo Bars, if making with wheat, replace the gluten-free graham wafer crumbs with equal parts wheat graham wafer crumbs!

Friday, January 22, 2010

Buttercream icing and decorations!!

Dear All,

Chocolate Cake,buttercream icing

From a very long time I was planning to enroll for a cake decoration classes but unfortunately here we donot have anything like http://www.wilton.com/. Infact the only type of cake decoration done here is using buttercream and very little of fresh cream. When i came across decoration classes being held by someone who has done cake decoration courses from Wilton and New York Institute I couldnt resist myself and immediately enrolled.

Chocolate Cake,buttercream icing

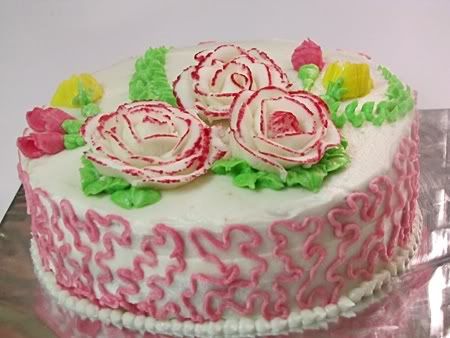
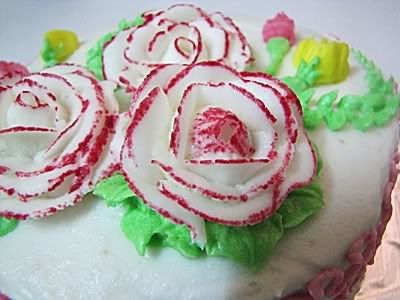
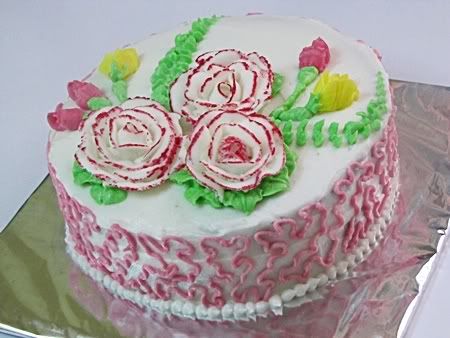
The class I enrolled was for Basic Buttercream Decorations, it was a 2 day class and the final result is infront of you. We learned different types of buttercream, their consistencies and use. Buttercream can be of 3 types thin, medium and stiff. Thin icing is used for frosting the cakes, writing, leaves, wines etc. Medium consistency is for decorations like star, shells and flowers. Stiff icing is used mainly for roses.

Decorations we learnt in the class are Star borders, Shells borders, Balls and Beads borders, Star Drop flower, Swirl Drop flower, Rose Buds, Sweet Peas, Writing messages, Leaves , Vines, Roses, Fern and Bows.

The Cornelli Lcce design you see around the side of the cake is completely my addition, it was not taught in the class. Also i have mildly brushed the sides of the rose petals with pink color using a paint brush to give a vibrant effect!

Chocolate Cake,buttercream icing

Overall i thouroughly enjoyed the class and learnt many different styles and techniques. I would say that these classes were very close to what http://www.wilton.com/ offers keeping in mind the challenges faced for getting the baking and decorating materials. I cant wait to try out her other classes :-)
If anyone is interested to learn about these classes, pls contact me and i will be more than happy to share the details.

Have a wonderful and relaxing weekend!!!

Friday, January 15, 2010

Gud Poli - Jaggery, Poppy Seeds, Sesame stuffed between Flat Breads

Dear Readers,

Wishing you all a very Happy Makarsankranti and Pongal. Last year when I was in Switzerland I missed most of the festivals back home; I remember how my sister used to make me jealous on phone by describing how much fun they had celebrating all the festivals :-( Kite Flying is very popular festival in India, especially in the cities of Ahmedabad, Vadodara, Jaipur and Hyderabad. Kite flying usually starts a month before the actual festival. On the day of Makar Sankranti the entire sky is filled with colorful kites and you can see everyone on top of their building roofs and having a blast! I remember few years back, during makar sankranti we visited my aunt's place where we spent the whole day flying kites and lanterns. We even made a BIG kite using several kites together joining their threads and finally attaching a lantern to it. It was a beautiful sight especially as we flew the kite in the night. I wish I had my camera with me to capture the brilliant shinning star!!

Gud Poli,Maharashtrian,Vegetarian,Makarsankranti

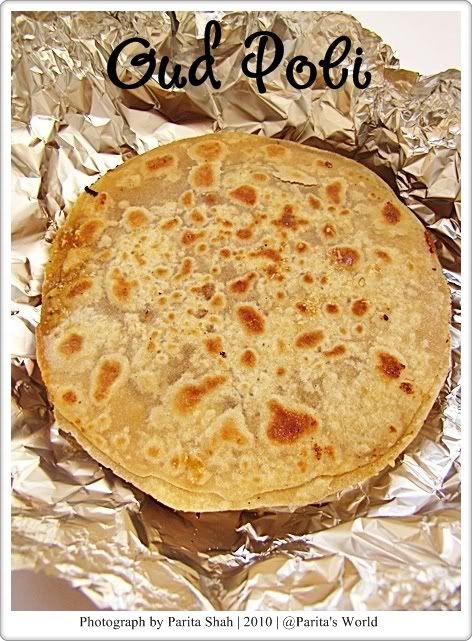
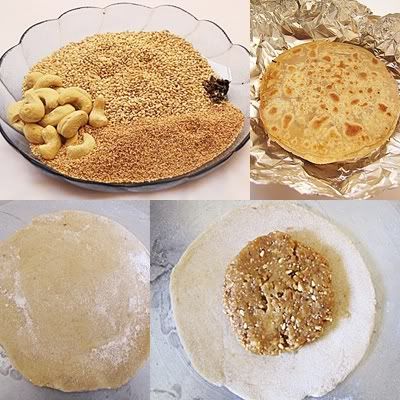
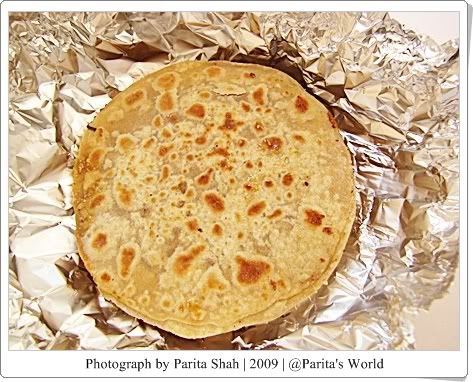
Makar Sankranti is celebrated in all parts of the country with great devotion. On this day tilgud laddoos made of sesame seeds and jaggery and are given as token of love and appreciation. A very famous saying in marathi is "Til-gud ghya, god god bola" meaning accept these tilguds and speak sweet words. Another famous dish which is prepared on this day is Gud Poli. Gud Poli's are prepared for lunch on Makar Sankranti. Grated jaggery, roasted poppy seeds and sesame seeds mixture is stuffed between two flat breads. The recipe is very  popular among kids and is perfect way to celebrate sankranti.

Gud Poli,Maharashtrian,Vegetarian,Makarsankranti
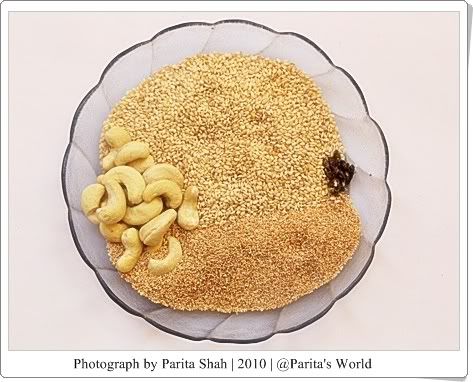
                       Cashewnuts, Roasted Sesame seeds, Cardamon seeds, Roasted Poppy seeds

Recipe Source: My dear friend Vrushali
Gud Poli: Recipe yields 6-7 polis
Ingredients for Stuffing:
1 cup grated jaggery (Adjust as per taste)
3 tbsp sesame seeds
2 tbsp poppy seeds
8-10 cashewnuts
seeds from 3 cardamon pods
1 tbsp roasted gram flour
1 tbsp warm sesame oil

Ingredients for Flat Bread dough:
1 1/2 cup whole wheat flour (atta)
3/4 cup all purpose flour (maida)
2 tbsp gram flour
1 tbsp warm sesame oil
water as required

Photobucket

Procedure:-

  • Roast the sesame and poppy seeds on a pan until light brown, keep them aside.
  • In the same pan roast the gram flour for about 2 mins.
  • Mix all the ingredients together in a mixer and pulse until well blended.
  • You should be able to form a medium consistency dough. You dont need to add any liquid as grated jaggery will become quite soft and mouldable.Grease your hands with oil/ghee and make small balls of stuffing and keep them aside.
  • For outer cover, mix everything together in a bowl. Slowly add little water and make a firm dough. The dough should not be too soft but more on a firmer side.
  • Make 14 equal sized balls from the dough.
  • On a floured surface, roll the ball to 3 inch diameter circle. Flatten the stuffing with your hands and place on top of the rolled dough. Roll another dough ball to similar size and place it on the stuffing.
  • Using very little water pinch in the sides of the dough to join them firmly.
  • Now very carefully and lightly roll the dough to spread the stuffing evenly.
  • Cook these polis in a non stick pan on slow heat, applying ghee/clarified butter on both the sides while cooking. 
  • Similarly make rest of the gud polis.
  • Make sure you have pinched both the ends properly or else the jaggery may ooze out during cooking which can  get quite messy!
  • Serve gud polis warm.

Photobucket

Verdict: I am not a huge fan of sweet polis/flatbreads but these were insanely tasty and i just couldnt stop eating them. I took few to office and my colleagues went crazy over these; they literally..I mean literally fought for these! I am planning to make these again this week for my family and I am sure everyone will enjoy these delicious sweet polis! I would urge you all to try these polis once TRUST ME you'll love it !!!

Gud Poli is off to Cooking with Sesame seeds event hosted by Priya


Friday, January 8, 2010

Rich Christmas Fruit Cake for a new beginning

Dear All,

Wishing you all a very Happy and Prosperous New Year !!!

Photobucket

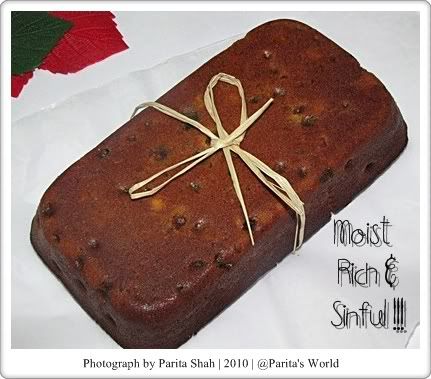
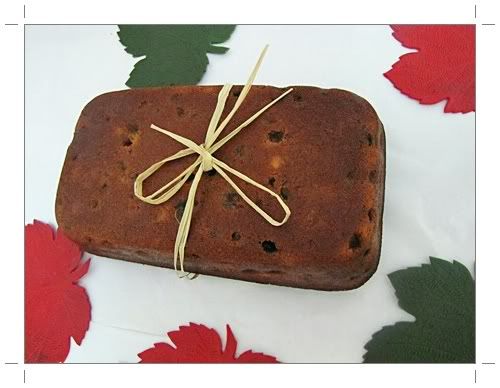
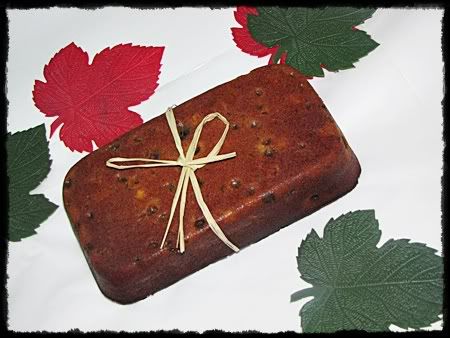
Christmas and New Year's Eve are definately not complete with a fruit cake. We know its christmas when the market is floaded with various types of fruit and dundee cakes, christmas trees and decorations. We dont really celebrate christmas but i love the season as it gives me a reason to bake! This was the first time I  made a fruit cake at home and definately not the last. I followed Raaga's recipe as a base and I absolutely loved the results! Cake turned out to be rich, moist and full of flavors!
Photobucket
I totally agree with Divya that the recipe is a keeper! I loved it for its simplicity and hassle free making. I didnt even dust the soaked dry fruits with flour but still the dry fruits got distributed evenly in the cake batter without sinking to the bottom. I used a combination of orange juice and rum for soaking my dry fruits as i wasnt keen on using only rum as this was the first time I was using alcohol in my cooking.

A very interested incident happened when i set out to buy Rum for my fruit cake. Here in india it is not very common to use Rum or Wine in cooking nor its common to find a girl standing in a liquor shop buying Rum!!! This was the first time i ever visited a liquor shop in my whole life. It was 31st dec, new years eve and the liquor shop was jam packed with men, as soon as i entered the shop all heads turned around in my direction as if they saw a ghost! Ignoring all glares i asked the person at the counter for some cooking rum, i must say the expression on his face was somewhere between shocked  and confused. Below is the conversation I had in 5 to 7 mins i spent in the liquor store, I hope you enjoy reading it :-)

Me: Can i get some cooking Rum pls? (trying to sound at ease)
He: Cooking...errrr what? (Confused)
Me: Rum...which can be used in cooking and baking...(flashing a smile)
He: (even more confused) Just a moment , I will be back.
(He went and consulted the owner of the shop , who looked like a stuffed teddy bear in denim jeans and a shirt which was specially stiched to fit him)
Owner: Yes how can i help you?
Me: I need rum which can be used in cooking.
Owner: (Surpirsed...shocked..cant really explain his expression) Oh..ok (talking to the other person)...Please get the XYZ rum bottle from up.
(I was getting extremely impatient after all I wasnt used to the idea of people staring at me as if I am an ET. After 2 mins I saw this big bottle of rum which i figured will go on for another decade)
Me: Oh this is very big bottle, can i get the smallest one available?
Owner: Errrr....Sure, 250 ml is ok?
Me: Perfect!!!

Photobucket

Recipe Source: Raaga
Pls Note: I have made few changes to the original recipe

Ingredients:
2 cups all purpose flour (300 gms)
1 cup dry fruits (raisins, dates, sultanas, currants, prunes)
1/2 cup mix  nuts (cashews, almonds, walnuts)
1/2 cup tuttu frutti
1 tsp baking powder
1/4 tsp cinnamon powder
1/4 tsp nutmeg powder
1/4 tsp clove powder
1/2 cup softened unsalted butter
1 cup light brown sugar
1 tsp vanilla essence
4 eggs
1 cup orange juice
3 tbsp rum (optional)

For Caramel:
1/2 cup sugar
3/4 cup boiling water

Procedure:

  • Soak the dry fruits, tutti frutti along with with cloves, cinnamon and nutmeg powder in orange juice and rum anywhere between 24 hours to 1 year. I soaked dry fruits for 2 days. Do stir the jar once a day.


  • On the day of making the cake, start by first making the caramel. In a heavy bottom pan, heat the sugar in a slow flame. The sugar will began to melt, stir this mixture slowly until all the sugar is melted and caramel is formed. When all the sugar crystals have been melted, add in boiling water and stir in to form smooth caramel syrup. Be very careful when adding boiling water as it will splutter a lot. Cool this mixture completely before using in the cake.


  • Sift the flour along with baking powder and keep it aside.


  • In a mixing bowl, beat together brown sugar and butter until light and fluffly. Slowly add in one egg at a time and beat well. Add in vanilla essence, dry fruits, flour and caramel mixture turn by turn. Mixing properly each time.


  • Grease & line 2 loaf tins and bake the cake at 180 degrees C for 40 to 45 mins. Do a tooth pick test to confirm.


  • Try storing the cake a week in the fridge wrapped in foil or cling film. This cake ages beautifully.

Rich Christmas Fruit Cake is off to Cake N Cookies event by Mahima and to Sara's Cakes N Cookies event.
This cake is also off to Divya's Show Me Your Cake event.